Quick Answer
Between drop-off and pickup, your car usually goes through more than a simple estimate and repair. A body shop checks visible damage, takes the damaged area apart to find hidden problems, updates the repair plan, orders parts, completes structural and cosmetic repairs, refinishes paint, reassembles the vehicle, calibrates safety systems when needed, and performs a final quality check before release.
You hand over your keys, sign a few papers, and then your car disappears behind the shop doors. That's often the part that feels the worst. You're already dealing with the accident, and now you're supposed to trust a process you can't see.
If you've been wondering what happens to your car between drop-off and pickup at a body shop?, you're asking the right question. The repair process isn't mysterious once you break it into stages, and knowing those stages helps you ask better questions, understand delays, and leave with a clearer picture of what was done to your vehicle.
Stage 1 The Initial Check-In and Estimate
The first estimate is a starting point. It is not the full story.
At check-in, the estimator looks at the damage that can be seen with the vehicle still assembled. That usually includes exterior panels, lights, trim, wheel area damage, and any obvious signs that the impact may have reached deeper parts of the car. Photos are taken, the visible damage is documented, and a preliminary repair plan is written.
What the shop can see at drop-off
An estimate at this stage is based on visible damage only. If the bumper cover is cracked, the fender is folded, and the headlamp is broken, those items go on the estimate. What can't be confirmed yet are the parts hidden behind them, such as brackets, mounts, reinforcement pieces, wiring, or structural components.
That matters because people often treat the first estimate like a final invoice. In collision work, that usually leads to frustration.
Practical rule: The first estimate tells you what the shop can confirm before disassembly. The teardown tells you what actually got hit.
What gets documented before repair starts
A careful intake usually includes a few basics:
- Visible damage notes that describe what was struck and where
- Photos that support the estimate and the insurance file
- Repair authorization so the shop can begin disassembly and inspection
- Discussion about claim handling if insurance is involved
If you want a better sense of why repair plans change after work begins, this guide on why a repair estimate goes up after the shop starts working on your car lays that part out clearly.
A good estimate also sets expectations. If the damage appears light, the car may move quickly. If the impact is around the suspension, frame area, or sensor-heavy front end, the shop may already warn you that the teardown could uncover more.
Stage 2 Teardown and Uncovering Hidden Damage
This is the stage most customers never see, and it's the stage that changes the repair more than any other.
Teardown means the technicians remove damaged panels and related parts so they can inspect what's underneath. That might mean taking off a bumper cover, headlamp, fender liner, trim, or door components to expose the actual impact zone. Once those parts are off, the shop can stop guessing and start confirming.
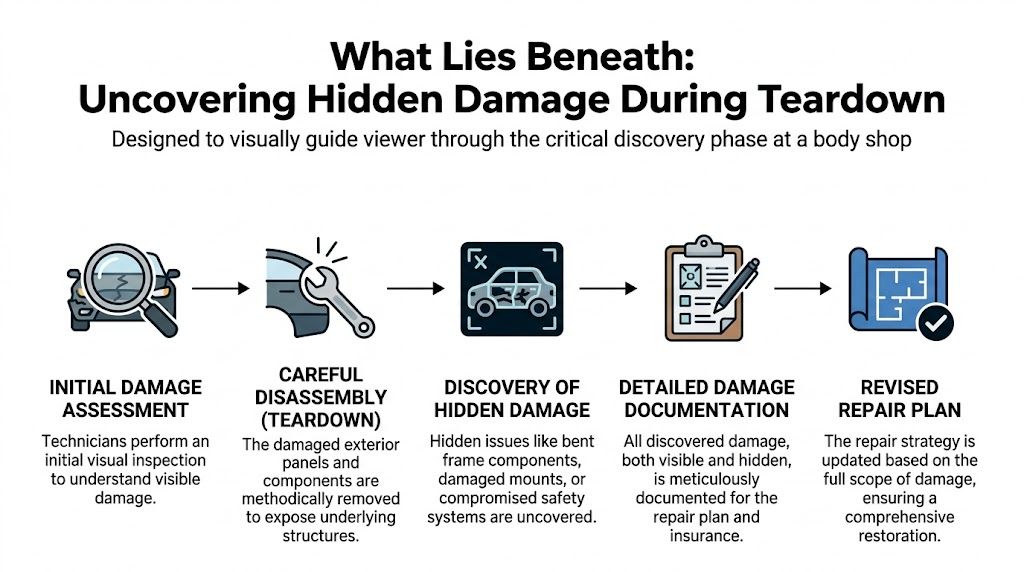
Why supplements happen
A supplement is the updated repair request sent to the insurer after hidden damage is found. This is normal collision repair work, not a sign that something went wrong at the estimate stage.
During teardown and inspection, hidden damage is uncovered in virtually 100% of cases involving moderate to severe impacts, and that updated estimate process showed that 22% of accidents in the last year resulted in a total loss declaration, according to Kelley Blue Book's explanation of totaled vehicles and post-teardown estimates.
That surprises people, especially after a crash that looked repairable from the outside. A bumper can absorb and hide a lot. So can a quarter panel, grille, or wheelhouse liner.
What technicians are looking for underneath
Once the outer parts come off, the shop may find:
- Bent mounting points that would keep new parts from fitting correctly
- Hidden structural movement behind cosmetic damage
- Cracked brackets or supports that weren't visible at intake
- Wiring or sensor damage in the impact area
- Damage severe enough to change the insurance decision
Sometimes teardown confirms the original plan. Sometimes it changes the job completely.
A supplement call is usually a sign the shop took the car apart far enough to find the real damage, not a sign they're making up work.
Why cars sometimes sit during this stage
From the outside, teardown can look like a delay. Inside the shop, it's the point where several things may happen at once. The technician documents added damage, the estimator updates the repair plan, the insurer reviews it, and the parts list may change.
That pause is frustrating, but skipping it creates bigger problems later. Ordering parts too early from a surface-only estimate can lead to the wrong parts, added downtime, and a car that gets disassembled twice.
Stage 3 Structural Repair and Body Work
Once the full damage is known and approvals are in place, the repair moves from discovery to correction, a stage when the vehicle's shape, fit, and foundation get restored before cosmetic work takes over.
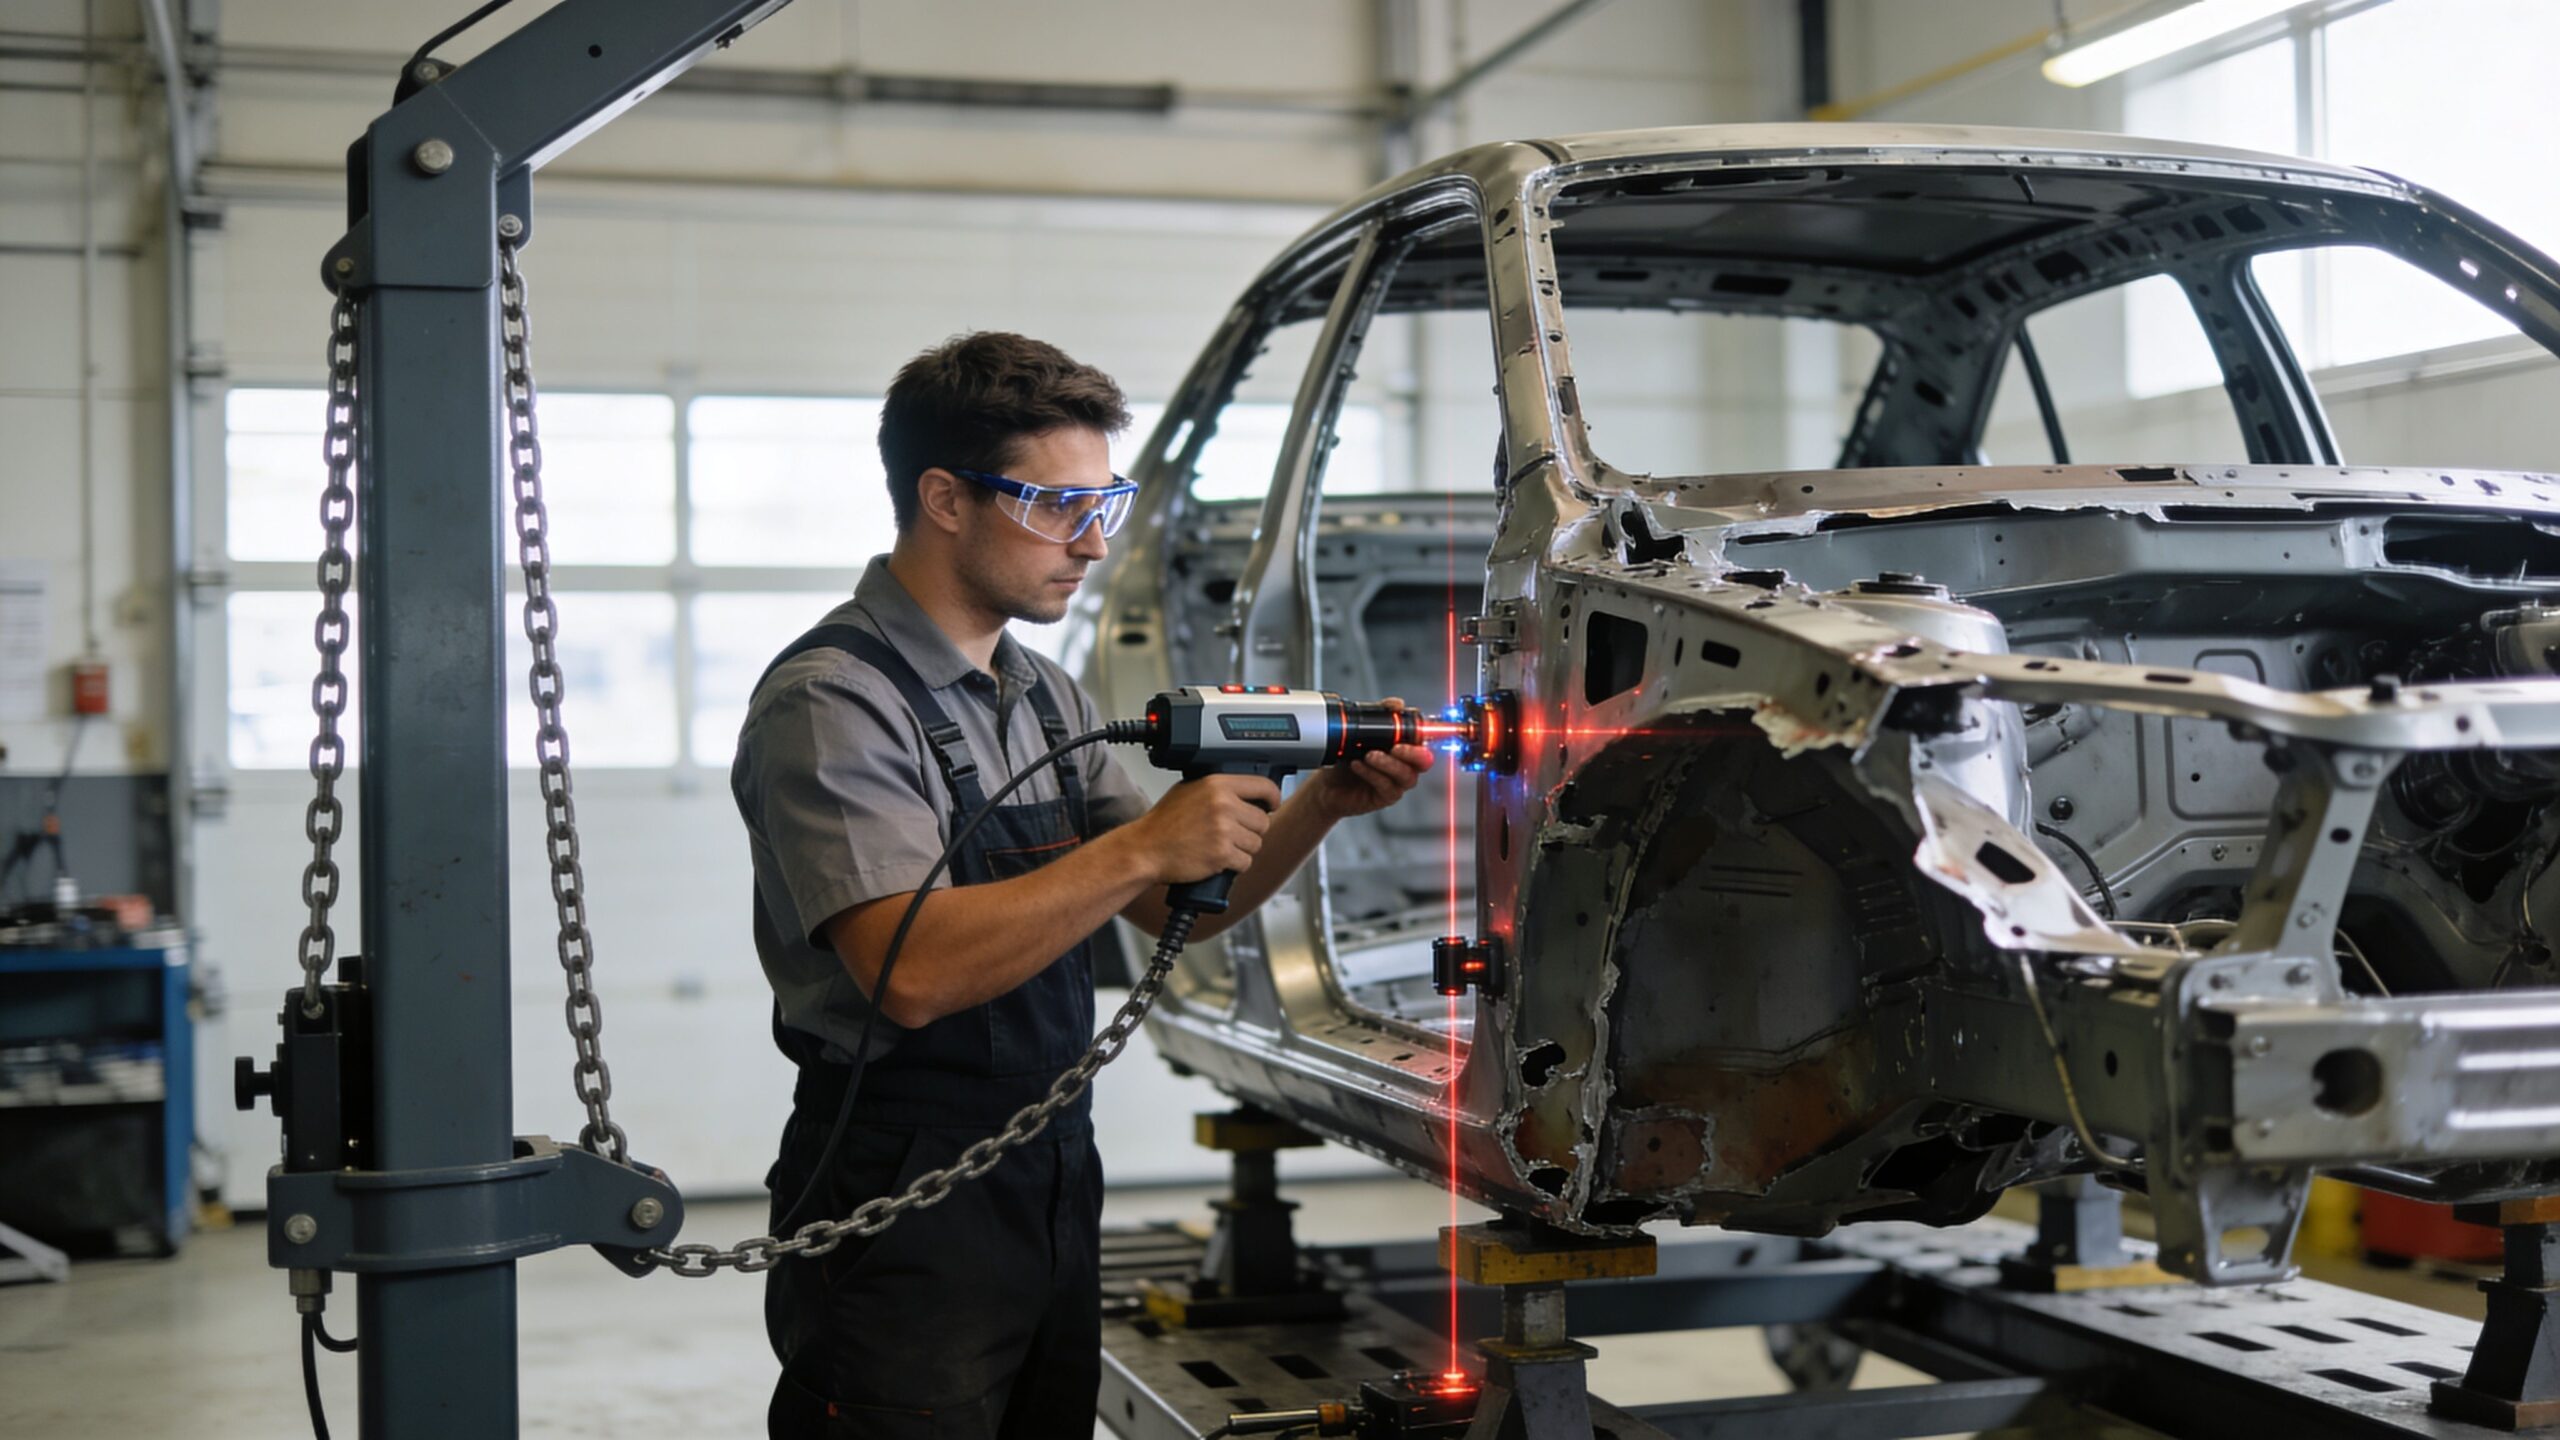
If the impact reached the structure, the car may go on a frame machine. Technicians measure the damaged areas against factory reference points and correct what moved.
Why structural repair matters before paint
Structural repair isn't about making the car look straight. It's about making the car be straight.
Technicians use frame machines to correct collision damage and restore the chassis to factory specifications with tolerances as precise as 1 to 3 mm. Uncorrected misalignment can lead to uneven tire wear, compromised handling, and reduced crash performance, as described in this overview of frame correction and measuring systems.
That means a car can look decent on the outside and still drive poorly if this step is skipped or rushed.
What body work includes after measurements
After the structure is corrected, the body repair side takes over. Panels are repaired or replaced, edges are aligned, mounting points are checked, and gaps are adjusted so the vehicle goes back together properly.
Some jobs also involve alignment and suspension checks because collision damage doesn't always stop at the sheet metal. If you're not sure whether an impact may have affected the underlying structure, this page on how to tell if your car frame is bent is worth reading.
What usually works and what doesn't
| Approach | What usually happens |
|---|---|
| Measure first | Parts fit better and the car tracks properly |
| Pull structure before body finish work | Panel alignment improves and rework drops |
| Try to fit cosmetic parts on a damaged structure | Gaps stay off and repairs snowball |
This is also one of the noisier parts of the process. Pulling, fitting, adjusting, welding, and test-fitting parts all happen here. To a customer, it can sound rough. To the shop, it's the part where the car starts becoming correct again.
Stage 4 The Art and Science of Paint and Refinishing
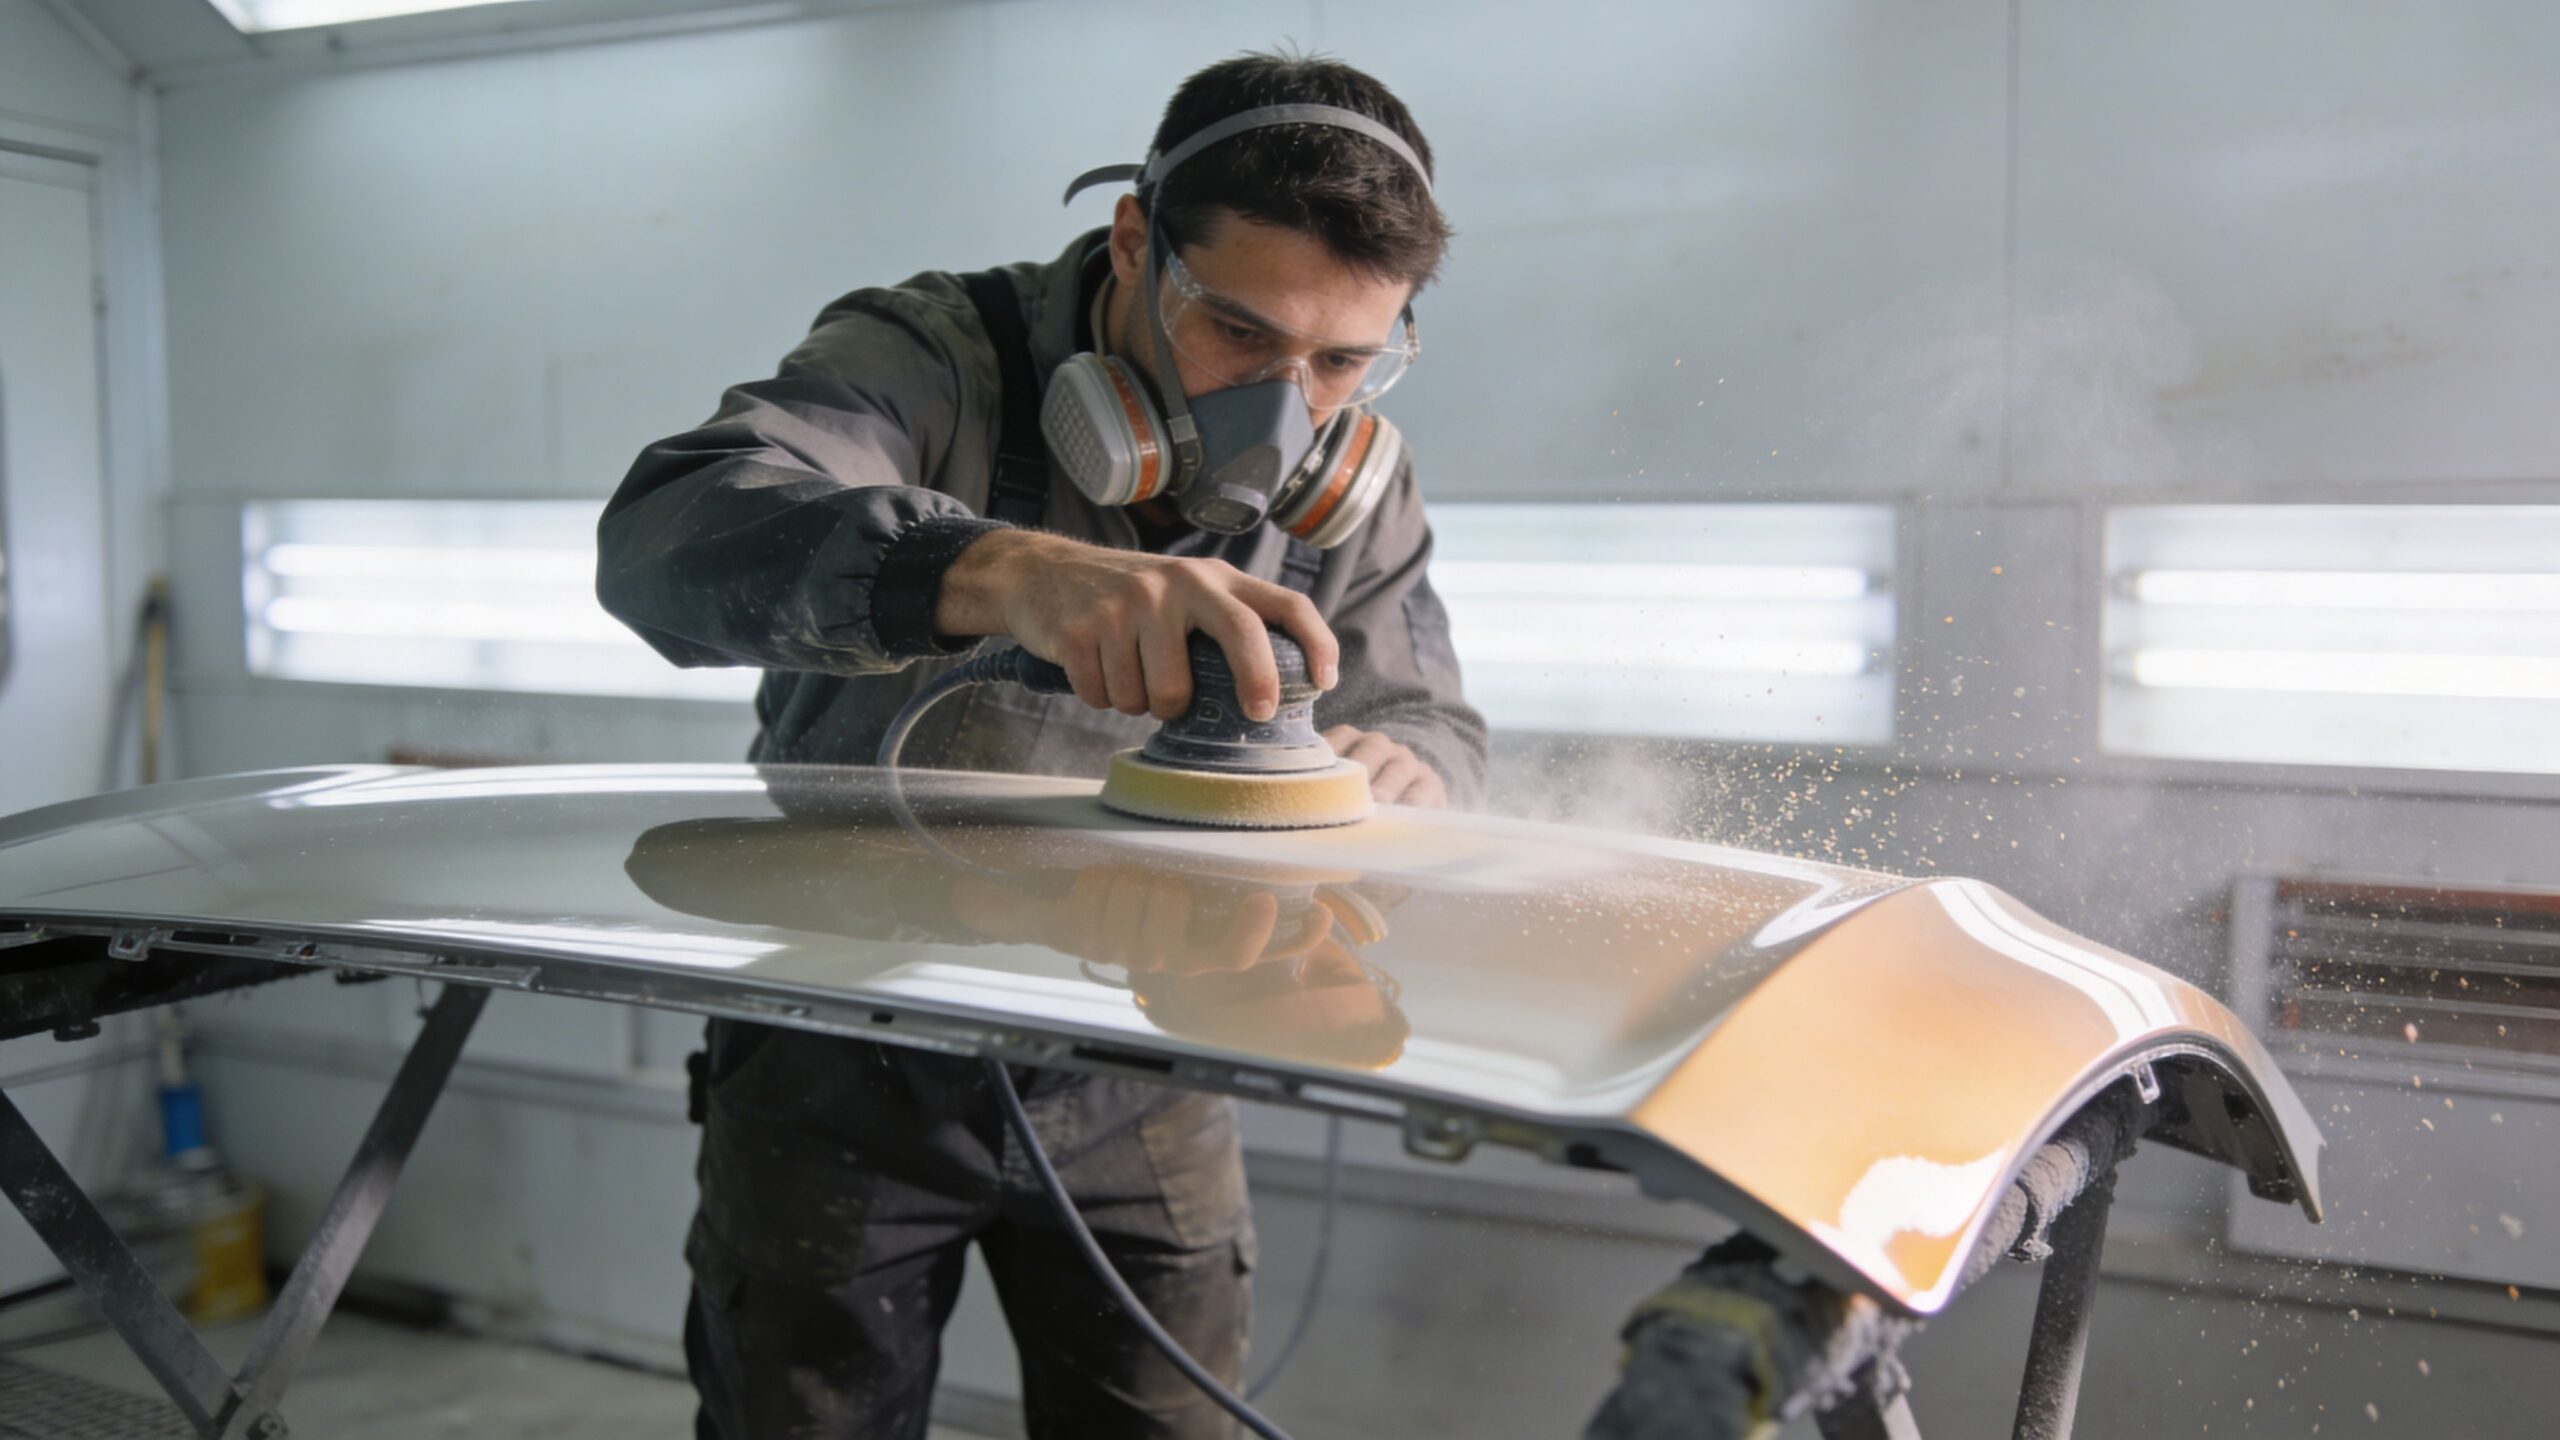
Paint work starts long before color goes on the car.
Before refinishing, technicians prep the repaired area by sanding, leveling, cleaning, priming, and masking. If the prep is sloppy, the finish won't hold up, no matter how good the paint code is. Good paint work is built on surface prep, not shortcuts.
Matching the color is part equipment and part judgment
Modern shops don't just eyeball paint. Technicians use a spectrophotometer to read the existing finish and get a color match accurate to within 0.5 ΔE units, then apply multiple clear coat layers cured at 140 to 160°F. This refinishing stage typically takes 2 to 4 days, according to this explanation of paint matching and curing.
That still doesn't mean every color is simple. Metallics, pearls, faded finishes, and older paint can require blending into adjacent panels so the repair disappears in normal light.
Why paint takes longer than customers expect
Paint has its own timeline because each layer needs proper preparation and curing. A rushed job may look acceptable at pickup and then show edge lines, texture problems, or failure later.
Paint quality depends on what happened before the spray gun came out. Surface prep, masking, blending, and cure time decide whether the finish lasts.
A well-done repair should look right in shade, in direct sun, and under lot lights at night. If you've ever picked up a car and thought one panel looked slightly off, the issue often traces back to prep, blend strategy, or color match work. This article on why the repaired panel on your car doesn't match the rest of the paint explains the common causes.
What happens before the car leaves the paint area
Before reassembly starts, technicians inspect the finish for dirt nibs, texture issues, gloss consistency, and edge quality. Minor finishing work may still happen at this point, including polishing and cleanup.
This stage is where collision repair starts looking complete to the customer. It still isn't ready to go home yet.
Stage 5 Reassembly and Advanced Safety System Calibration
After paint, the vehicle goes back together piece by piece. Trim, lamps, liners, handles, clips, moldings, bumpers, and repaired or replaced components all have to be reinstalled correctly.
This stage sounds simple to people outside the trade. It isn't. Reassembly is where fit issues show up, clips break, fasteners get verified, and every removed part has to return without creating rattles, warning lights, or cosmetic problems.
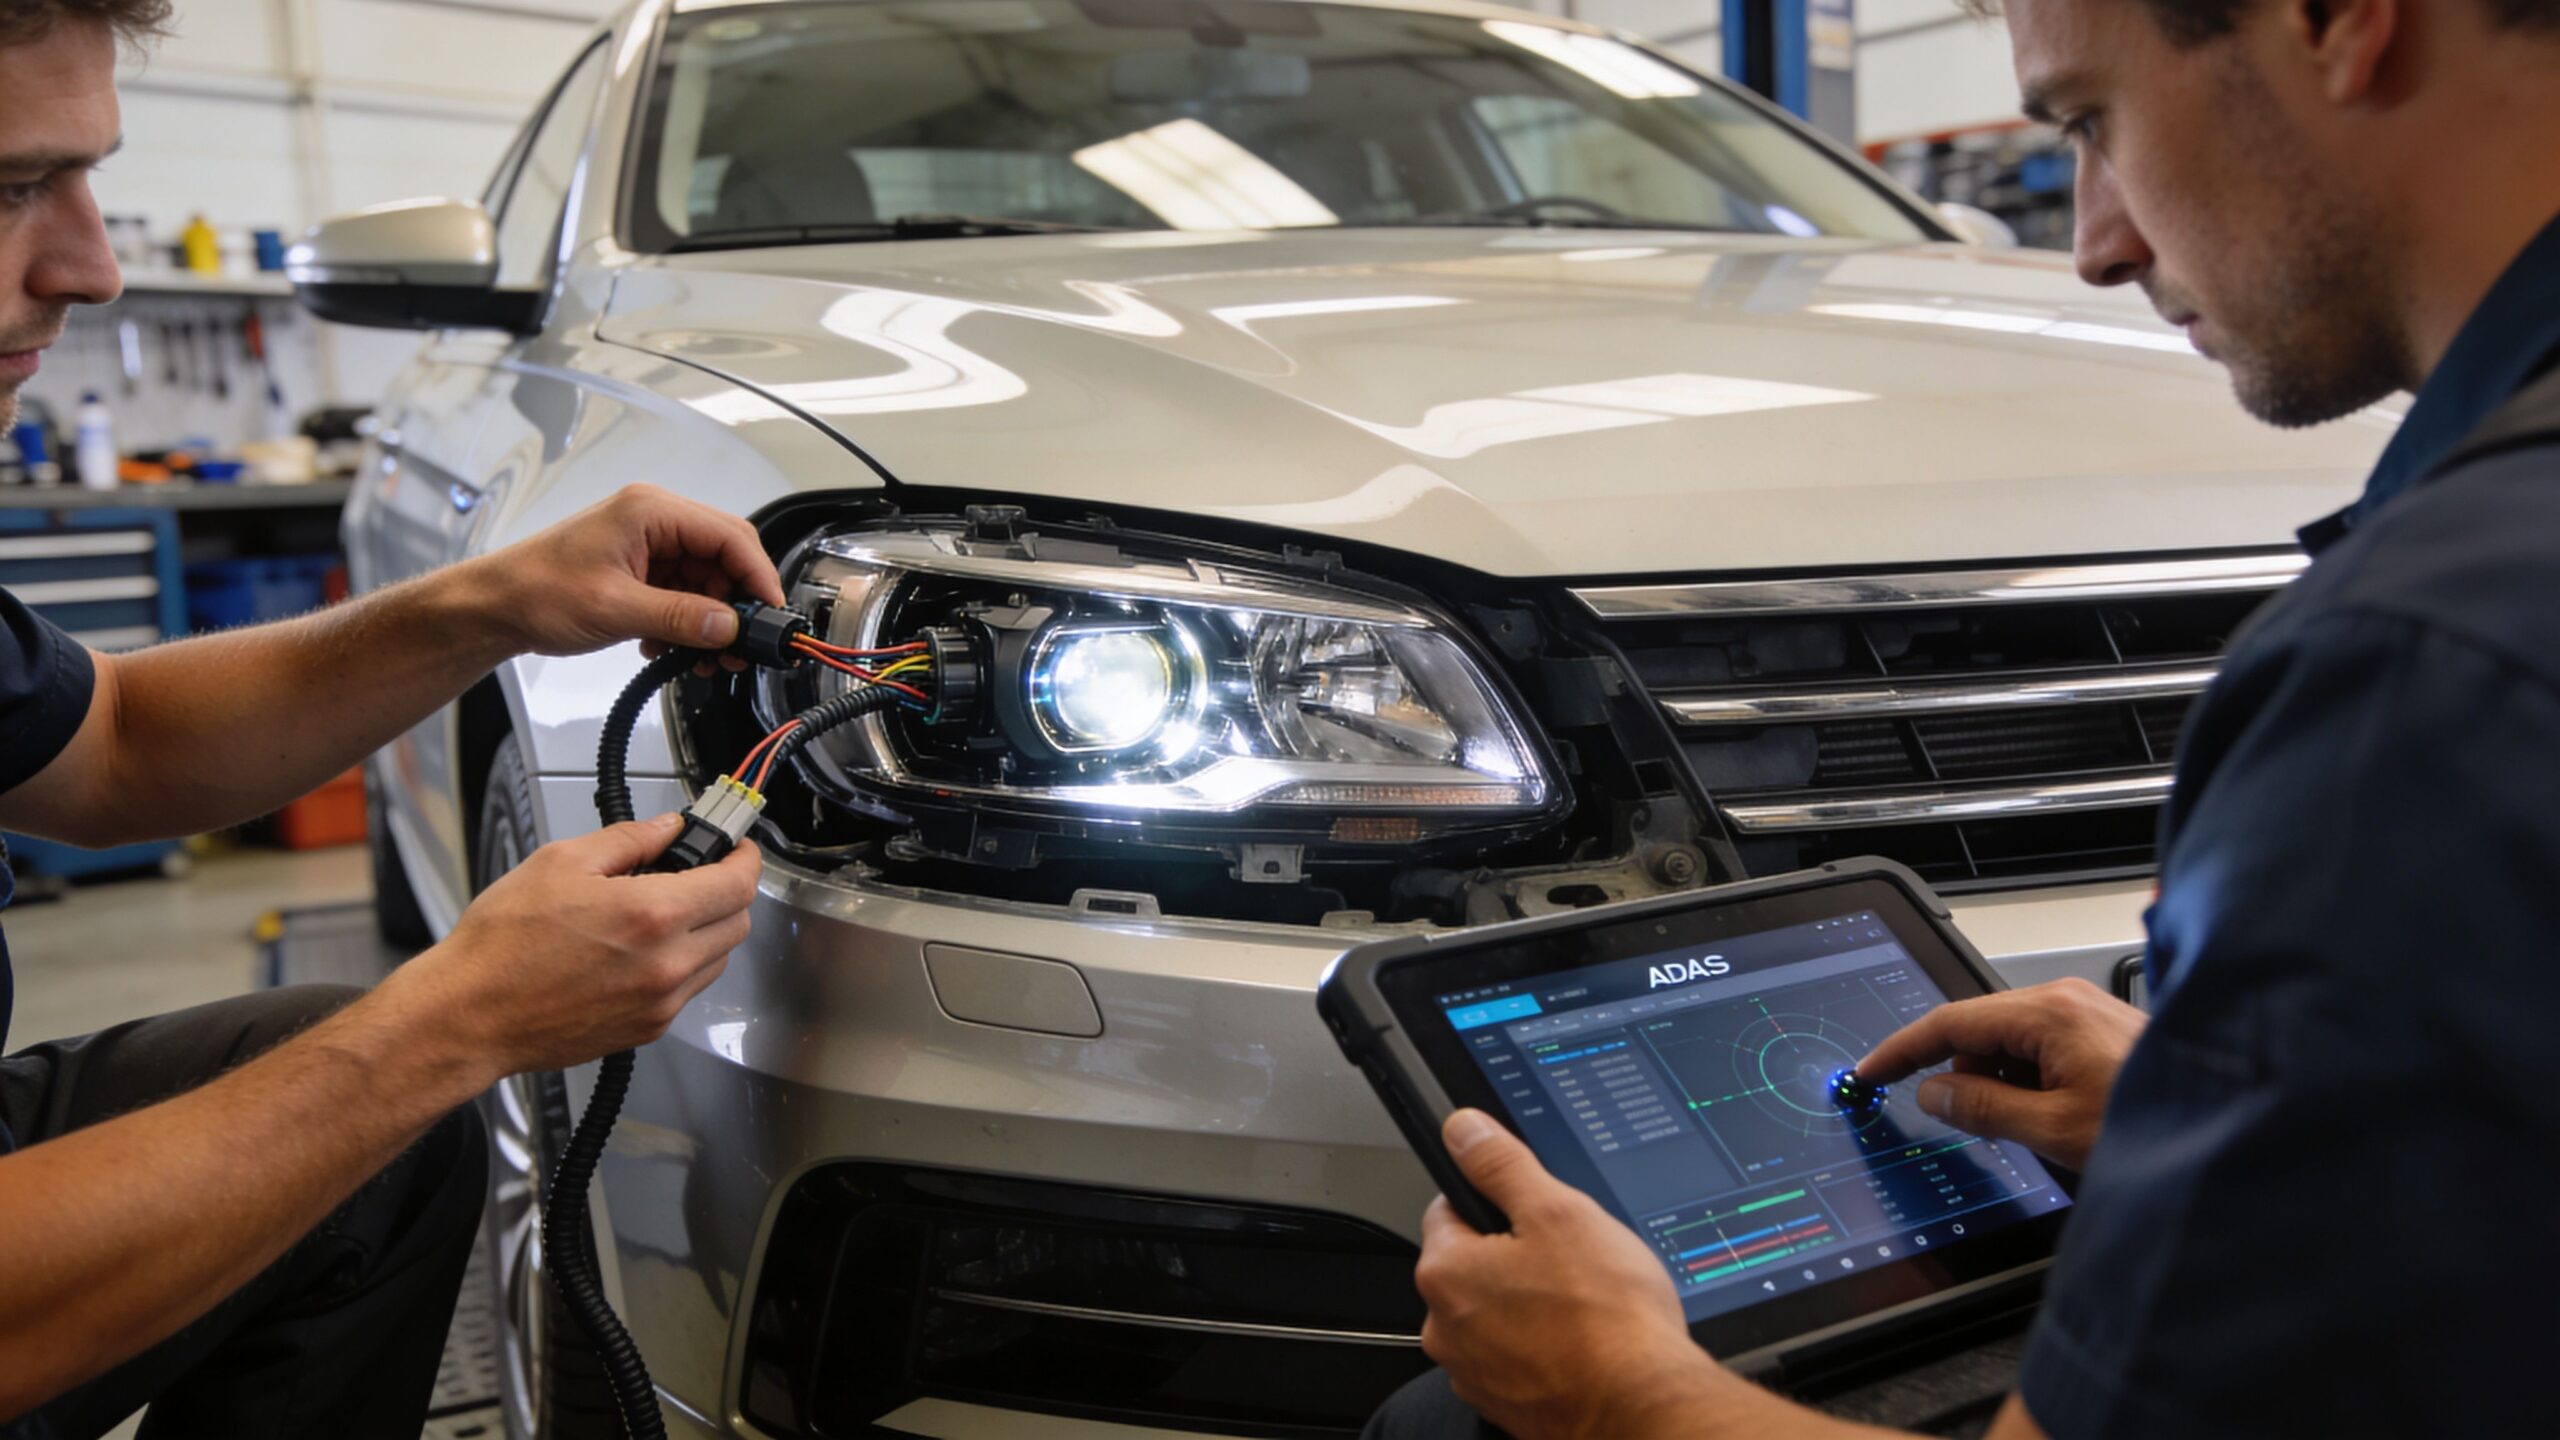
Why modern cars need calibration after repair
Many vehicles now have cameras, radar units, and other driver-assistance hardware mounted in areas that commonly get hit in collisions. That includes bumpers, mirrors, windshields, grilles, and front-end structures.
Over 60% of modern vehicles involved in collisions require ADAS calibrations, and for model year 2020 and newer vehicles, nearly 90% of repairs require this by OEM guidelines, as noted in this discussion of post-repair issues and calibration needs. If calibration is skipped, systems such as forward collision warning may not work properly.
What calibration protects
Reassembly isn't finished when the parts are back on. The car also has to know where its safety systems are in relation to the road and to the vehicle's structure.
That can affect:
- Forward collision warning
- Lane-related camera functions
- Radar-based distance sensing
- Lighting or aiming functions tied to repair work
If a front bumper was removed, a windshield was replaced, or the structure behind a sensor moved during the impact, calibration may be necessary before delivery.
If your car has modern safety features, ask whether any post-repair calibration was required and whether that documentation will be included at pickup.
Why this stage can add time
Calibration depends on the vehicle, the damaged area, the manufacturer's procedure, and whether all prerequisite repairs are complete. The shop can't calibrate a system accurately if ride height, alignment, glass position, or panel fit is still off.
This is one reason a car may look done before it's ready. Looking finished and being safe are not always the same moment in the process.
Stage 6 The Final Quality Control Inspection
The last stage is where the shop tries to catch problems before you do.
A final quality control inspection checks the repair from the customer's point of view and from the technician's point of view. That means looking at panel fit, paint finish, warning lights, lights and accessories, trim fit, and the way the vehicle drives.
Why final inspection matters so much
The industry average for customer go-backs is 10.9%, and for complex repairs over $10,000, that figure can rise to 26.6%, according to the verified data. That is why a rigorous final inspection matters. It is the main tool certified shops use to reduce missed items before delivery.
If a shop skips this stage or rushes it, little things slip through. A loose trim piece. A sensor issue. A panel that sits slightly proud. A paint edge that should have been corrected before pickup.
What a serious QC check usually includes
A proper final check often covers:
- Panel alignment so gaps look even and parts sit flush
- Function checks for lights, windows, locks, and electronics
- Road feel to catch pull, vibration, or noise after repair
- Finish review under good lighting
- Paperwork review so the customer leaves with a clear repair record
Some of the most expensive customer dissatisfaction in this business comes from small misses at the end. Not major structural failures. Small misses that tell the owner nobody slowed down and looked at the whole car before calling it done.
Your Questions About the Repair Process Answered
Why did my repair estimate go up after I dropped off the car?
Because the first estimate is based on visible damage. Once the shop removes damaged parts, hidden damage often shows up underneath, and the repair plan has to be updated. That's why supplements are a normal part of collision repair.
Why is my car waiting if the damage doesn't look that bad?
The visible damage doesn't always tell you what the repair depends on. The shop may be waiting on supplement approval, replacement parts, or a required calibration step after repairs are complete. A car can also be in line for the next stage even though one phase is finished.
Can I choose my own body shop in California?
In plain terms, yes. California Insurance Code § 758.5 limits insurer steering, which means your insurer generally can't require you to use a particular shop. California's Auto Body Repair Consumer Bill of Rights, found at 10 CCR § 2695.85, also gives you important information about estimates, authorizations, and your repair choices. For advice about your exact claim, talk with your insurer or a licensed professional.
What should I ask the shop while my car is being repaired?
Ask what stage the vehicle is in right now. A useful update sounds like "we're in teardown," "we're waiting on parts," or "paint is complete and the car is in reassembly." That tells you much more than "we're still working on it."
Will my insurance pay for everything that needs to be done?
Insurance usually covers necessary repair work based on your policy and the facts of the claim, but coverage details vary. The shop can document what the vehicle needs, and the insurer decides what is approved under the policy. If your damage involves related glass issues, this article on whether liability insurance covers windshield replacement may help clarify one common point of confusion.
How long will the whole process take?
It depends on the damage, parts availability, insurer response time, and whether calibration or structural work is required. Minor cosmetic work can move quickly, while larger collision repairs can take much longer. The best thing to ask is not just "when will it be done?" but "what stage is the car in, and what is it waiting on?"
What should I get when I pick up the car?
Ask for your final repair order and any documentation tied to the work performed, especially if the repair involved modern safety systems. You should also review the car in good light, check operation of basic features, and ask what the warranty covers.
Know What to Expect From Your Collision Repair
When you understand what happens to your car between drop-off and pickup at a body shop?, the process gets a lot less frustrating. You know why the first estimate may change, why the car may pause between stages, and why a vehicle that looks finished may still need inspection or calibration before it's safe to release.
For drivers in Salinas and the Monterey Bay Area, the biggest difference usually isn't just repair skill. It's communication. Shops that explain the process clearly, document changes, and hand the car back with complete records make the whole experience easier to trust. If you're comparing repair facilities, it also helps to understand what it means when a body shop is AAA approved.
If you'd like to talk through a repair before making a decision, Searson Collision Center offers free estimates and straightforward guidance for drivers in Salinas and the Monterey Bay Area. Call (831) 422-2460, visit 488 Brunken Ave, Salinas, CA 93901, or stop by Monday through Friday, 7:00 AM to 5:00 PM.